How to make a Metal Detector

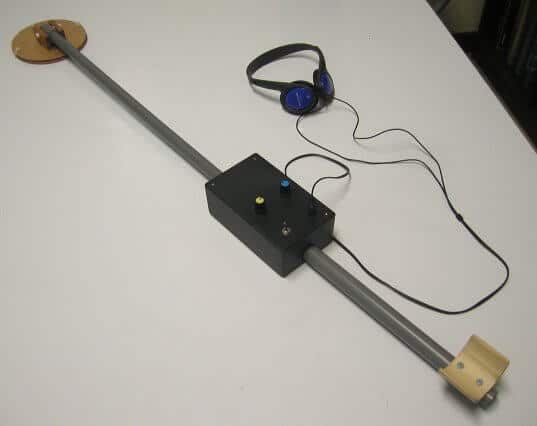
A metal detector is a device that is used to detect the presence of metal objects. The instrument is beneficial for finding metal objects hidden under the ground. The device usually comes with in handheld design with a sensor coil at the bottom. The instrument is moved across objects and over the ground to detect objects. The presence of metal makes a tone in the earphones change or a needle on the indicator move.
Most metal detectors are fairly inexpensive, and homemade metal detectors are a bit tricky to build. Apart from gathering up parts, you also need to know how to connect electrical circuits. This process is perilous, especially with sparks that may arise due to wrong wiring. If they are constructed incorrectly, you may fail to get the results that you desire.
Unless you are building one for fun, you will be better off buying a budget metal detector than attempting to make one.

But, did you know you can make a rudimentary metal detector using household items? You can build your own metal detector that is small, easy to use, and also save money in the process. Best of all, making a metal detector is both educational for you and your kids.
A simple way is to use an instrument that has a magnet on it to make a metal detector. You can utilize your FM radio and calculator to create a crude metal detector.
Radio and Calculator Metal Detectors
These are two straightforward instruments to find and use. Believe it or not, this actually works. Let's see how you go about the process.
What are the items that you will require for this exercise?
- A battery-powered portable radio that has both FM and AM bands
- A fully operational battery powered calculator. A solar-powered calculator won't work well in this exercise.
- Duct tape or adhesive.
Make a Radio and Calculator Metal Detector
Step 1
Tune the radio and carefully set it to the highest AM station possible. Be sure that you do not stop on a station as this can interfere with the desired results. There should be no audio being received from radio stations. If you have set it correctly, you should hear static only.
Step 2
After that, you will set the sensor part of the detector. Turn the calculator on and position against the back of the radio. You can use a glue stick, tape, or an adhesive strip to attach the two. Ensure that the two parts are secured to each other properly. There should not be a chance of them slipping apart.
Step 3
After securing both the calculator and radio, check to see if they are emitting a constant tone. If there is no clear sound being heard, it will be challenging to utilize it. If the instrument is emitting a crisp, clear sound, you can go ahead and mount it on a rod and then secure it using tape.
Step 4
Mounting can be done on anything that you find convenient, a broomstick, a ruler, pole, or anything that can be held above the ground. You can apply glue or tape to attach the device to the shaft. Zip ties can also be a great option if you don't wish to use adhesive or tapes.
Step 5
Test the metal detector on various metallic household objects. This is a straightforward way of testing if the instrument is working. You can test using coins, gold rings, silver spoons, jewelry, watches, cups, etc.
If the tool quickly detects the objects, it will work better outside. When the metal detector senses metal, it produces a constant clear sound.

How does a radio and calculator metal detector work?
The circuit board of the battery-powered calculator emits a detectable radio frequency. The radio waves bounce off of metal objects, enabling the radio's AM receiver to pick up the waves and then amplify them. This is the sound that is heard when the instrument is close to a metal object. If music were on the radio, it would be challenging to hear to the faint radio signal being generated.
Utilizing Smartphone Applications as Metal Detectors
If you are not that enthusiastic about DIY projects, you can still make a quick and easy metal detector by using your Smartphone. How cool is that? What do you need to accomplish this successfully?
- A Smartphone (iPhone or Android)
- The ability to download applications from the app store and installing them.
Let's look at how you can go about this.
Step 1
There are various metal detecting apps on the Apple and Google app stores. Download one of the applications and it will use your Smartphone to detect metal objects.
Step 2
Move your Smartphone over various metallic objects to check if it works. Adhere to the instructions that are provided with the application. After following the instructions, one after the other, test if it operates.
If one of the steps is not implemented, you won't get the desired results. If the application you downloaded is not picking up metal objects correctly, you will need to switch to a better app. You may research further to have an insight into which application works better for your make and model of smartphone.
Step 3
Carefully look for changes when moving your Smartphone over a metal object. When the smartphone is passed over a metallic object, the electromagnetic field on the Smartphone instantly changes.
After measuring the electromagnetic magnetic field in the location your phone is, the color changes on the screen turn from green to red when metal is near. The programs have a baseline which displays the measurements after detecting a metallic object. The measurement rises, triggering color change.
Smartphone metal detecting applications are not efficient if you decide to go treasure hunting. Also, they may fail to detect some metals like platinum and other jewelry. But, the process of making a Smartphone detector is not complicated and it is fun to play with.
Benefits of making a metal detector at home
- You can use your homemade metal detector to look for items like paper clips, metal screws, and other small metallic objects that tend to get lost around the house.
- The process of making a homemade metal detector can be an exciting learning experience for your kids (i.e., understanding radio signals).
Considerations
When making a metal detector using household items or downloading a metal detecting application from the app store, remember that there are problems with these instruments. The two homemade sensors are not sensitive enough to do “real” metal detecting or properly designed to efficiently operate in harsh environments, especially when exposed to rain, snow, dirt, or other extreme weather conditions.
The metal detector parts are not that powerful. They are only designed to give an approximation of where a metallic object is. They don't provide an accurate location. Additionally, they are not very reliable compared to those in the market.
Conclusion
Figuring our how to make a metal detector is a great learning experience. Metal detectors are fun and straightforward to develop and use. The process of making such an instrument is an educational and fun activity for the family.
At the same time, it is important to understand that there are companies that have been making metal detectors and improving their technology for decades. If you need to do serious metal detecting, prospecting, or treasure hunting, you are far better off to purchase metal detector.


